Provision and configure a project
Administrator reference for creating project records and configuring an existing project's supported options.
This guide is for global RERA administrators who can sign in with an active, confirmed, unlocked account. Project creation belongs to the administrative record interface. An assigned project manager does not gain global administration or self-service project provisioning by accepting a team invitation.
The normal project interface supports editing an existing project under the applicable permissions. Use Project information and documents for that narrower workflow.
Prepare the project records
- Sign in with an authorized global administrator account and open the administration interface at
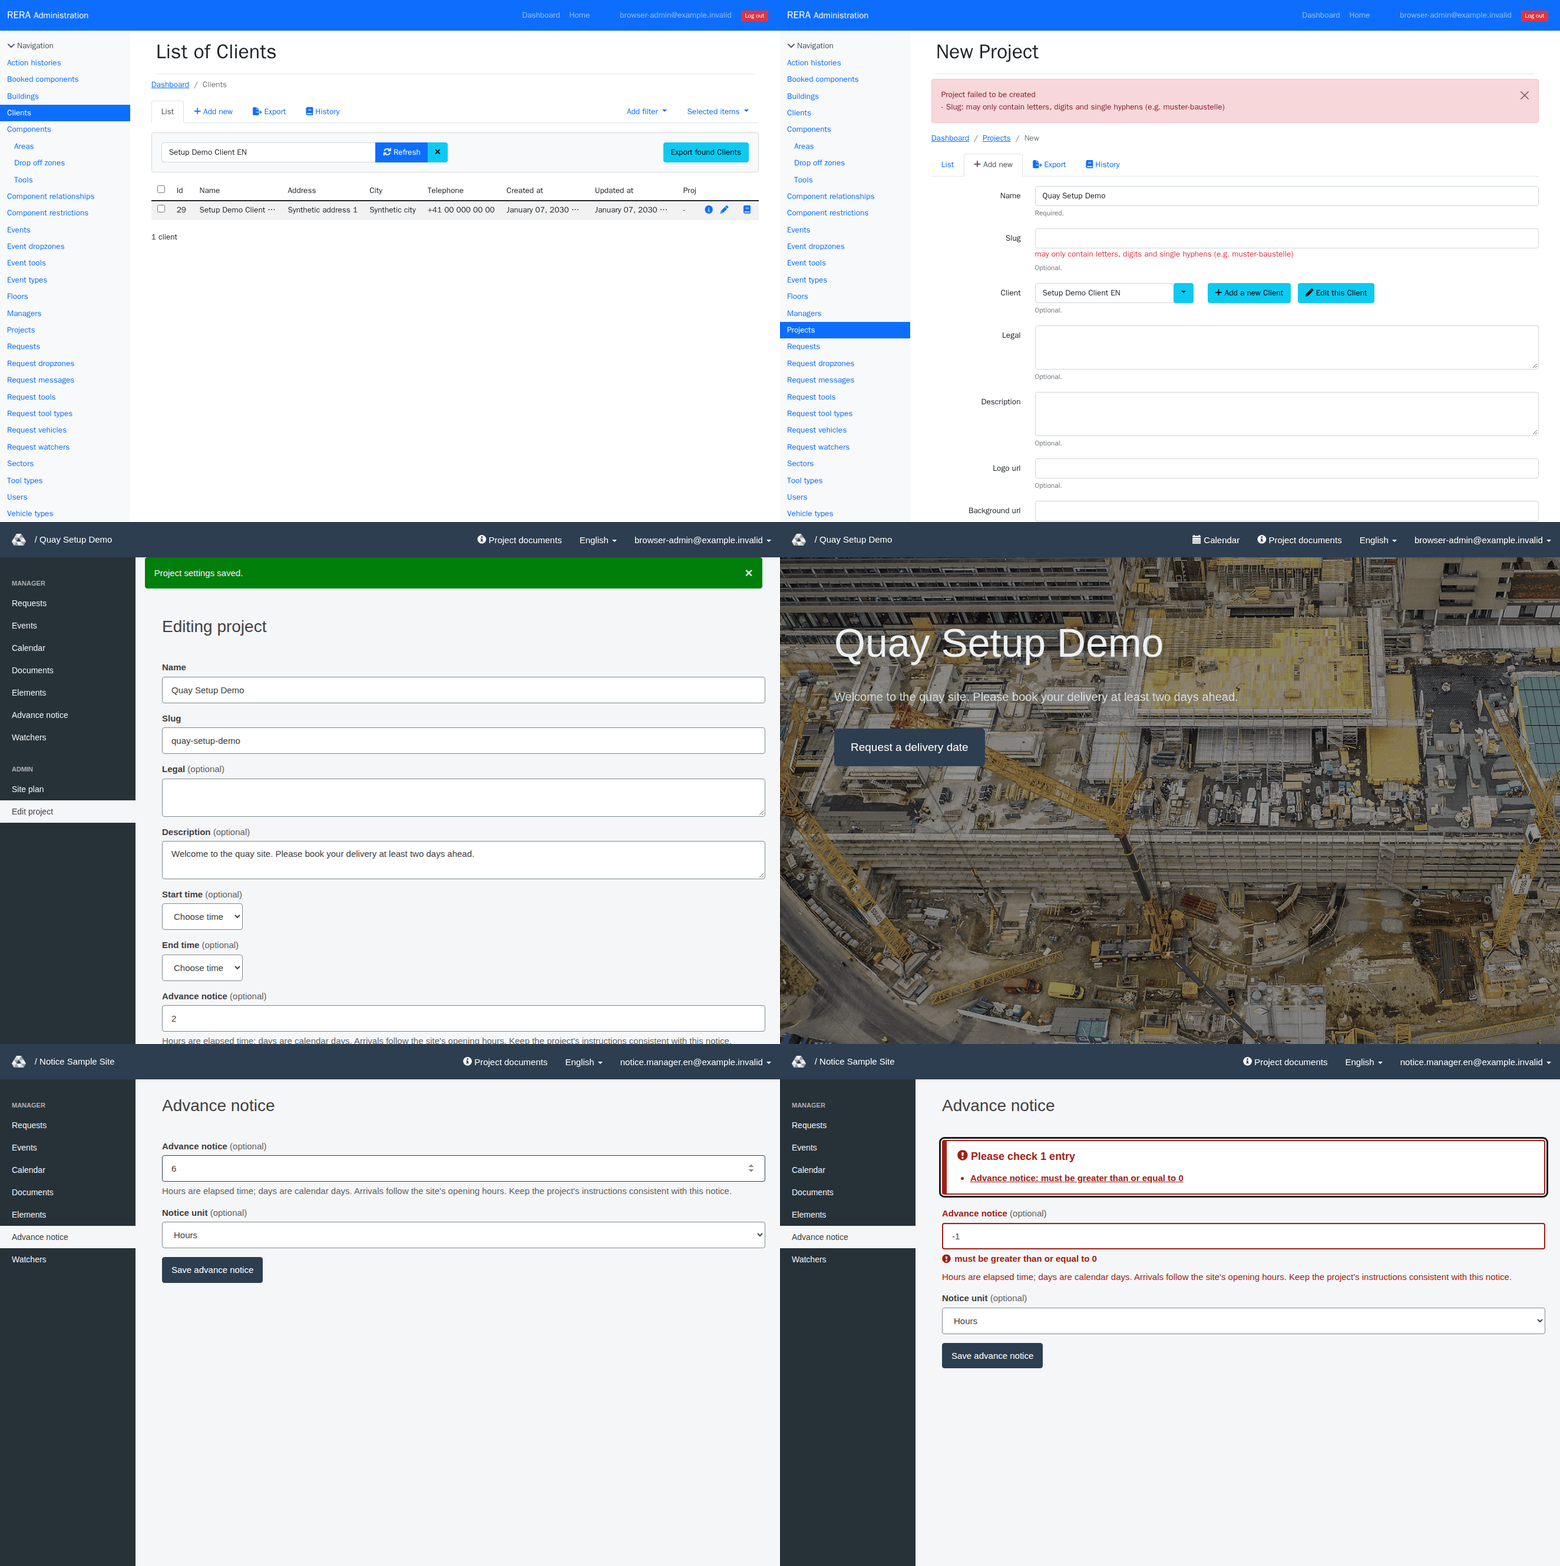
/admin. - Select the client records. Use the intended existing client, or create the required client record with its name.
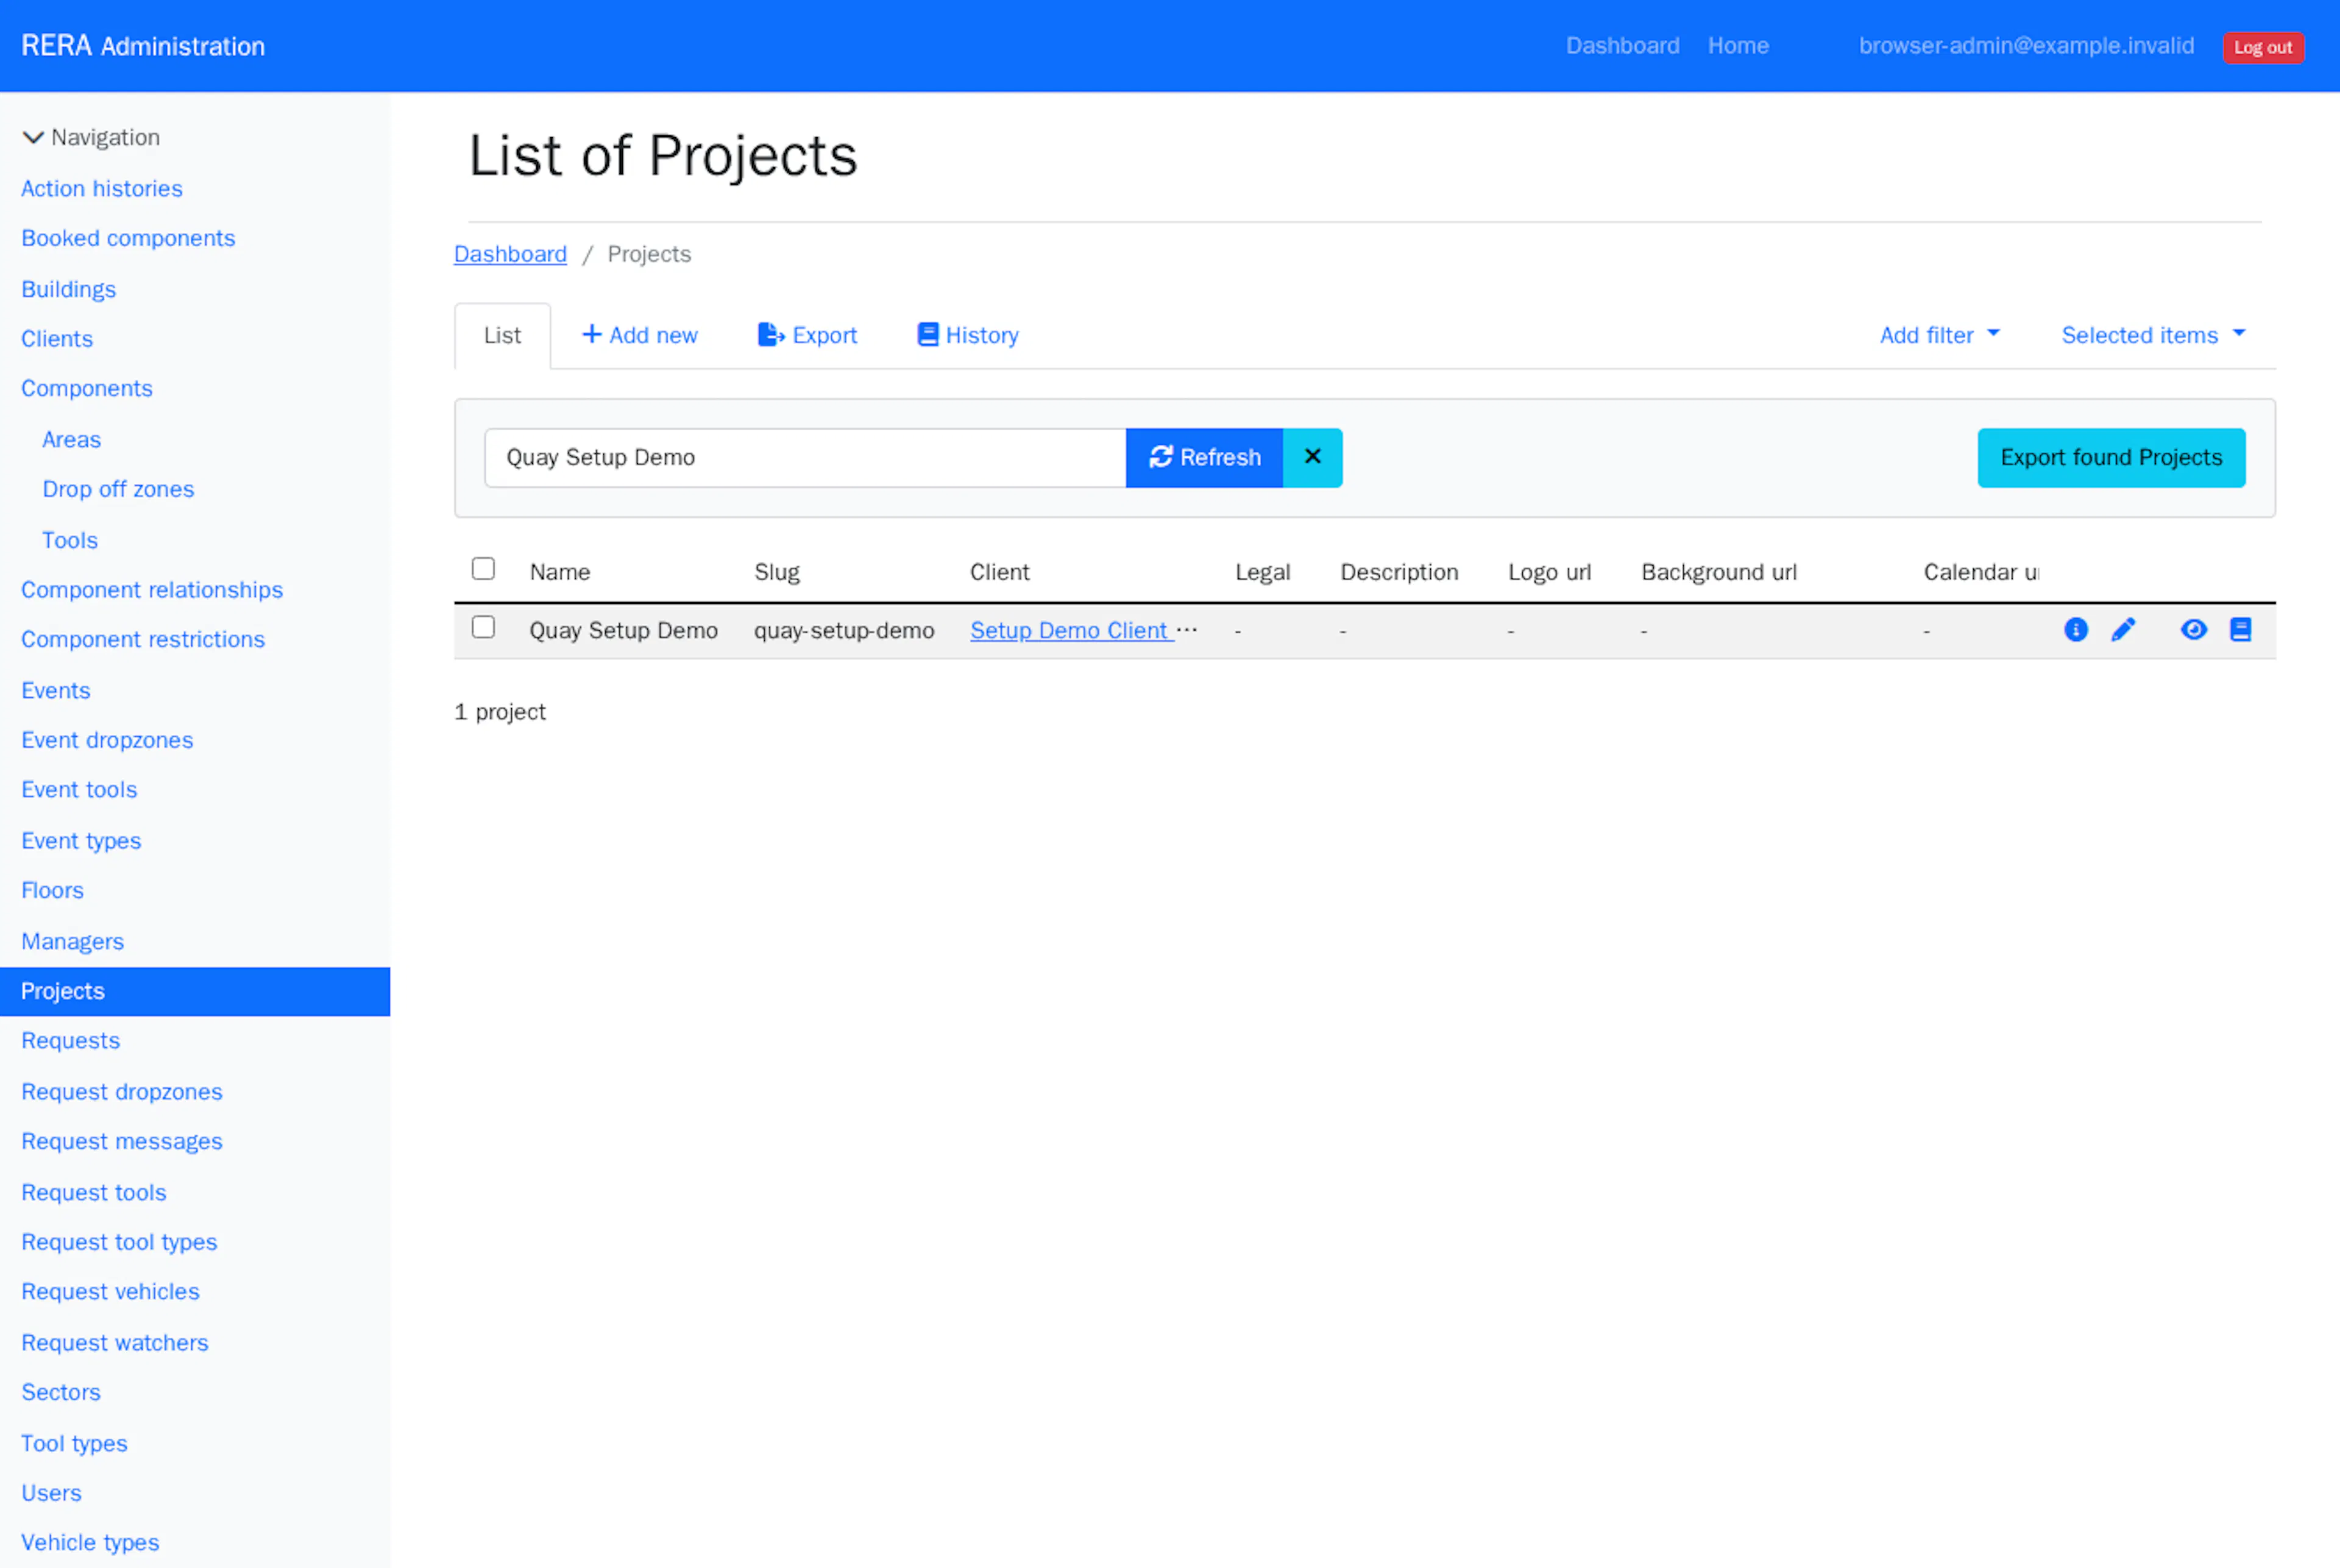
- Select the project records and use the record-creation control. Associate the project with the intended client and provide its name.
- Save the record and correct any validation errors. A project name is required. If you fill in the Slug, it is the project's public address (
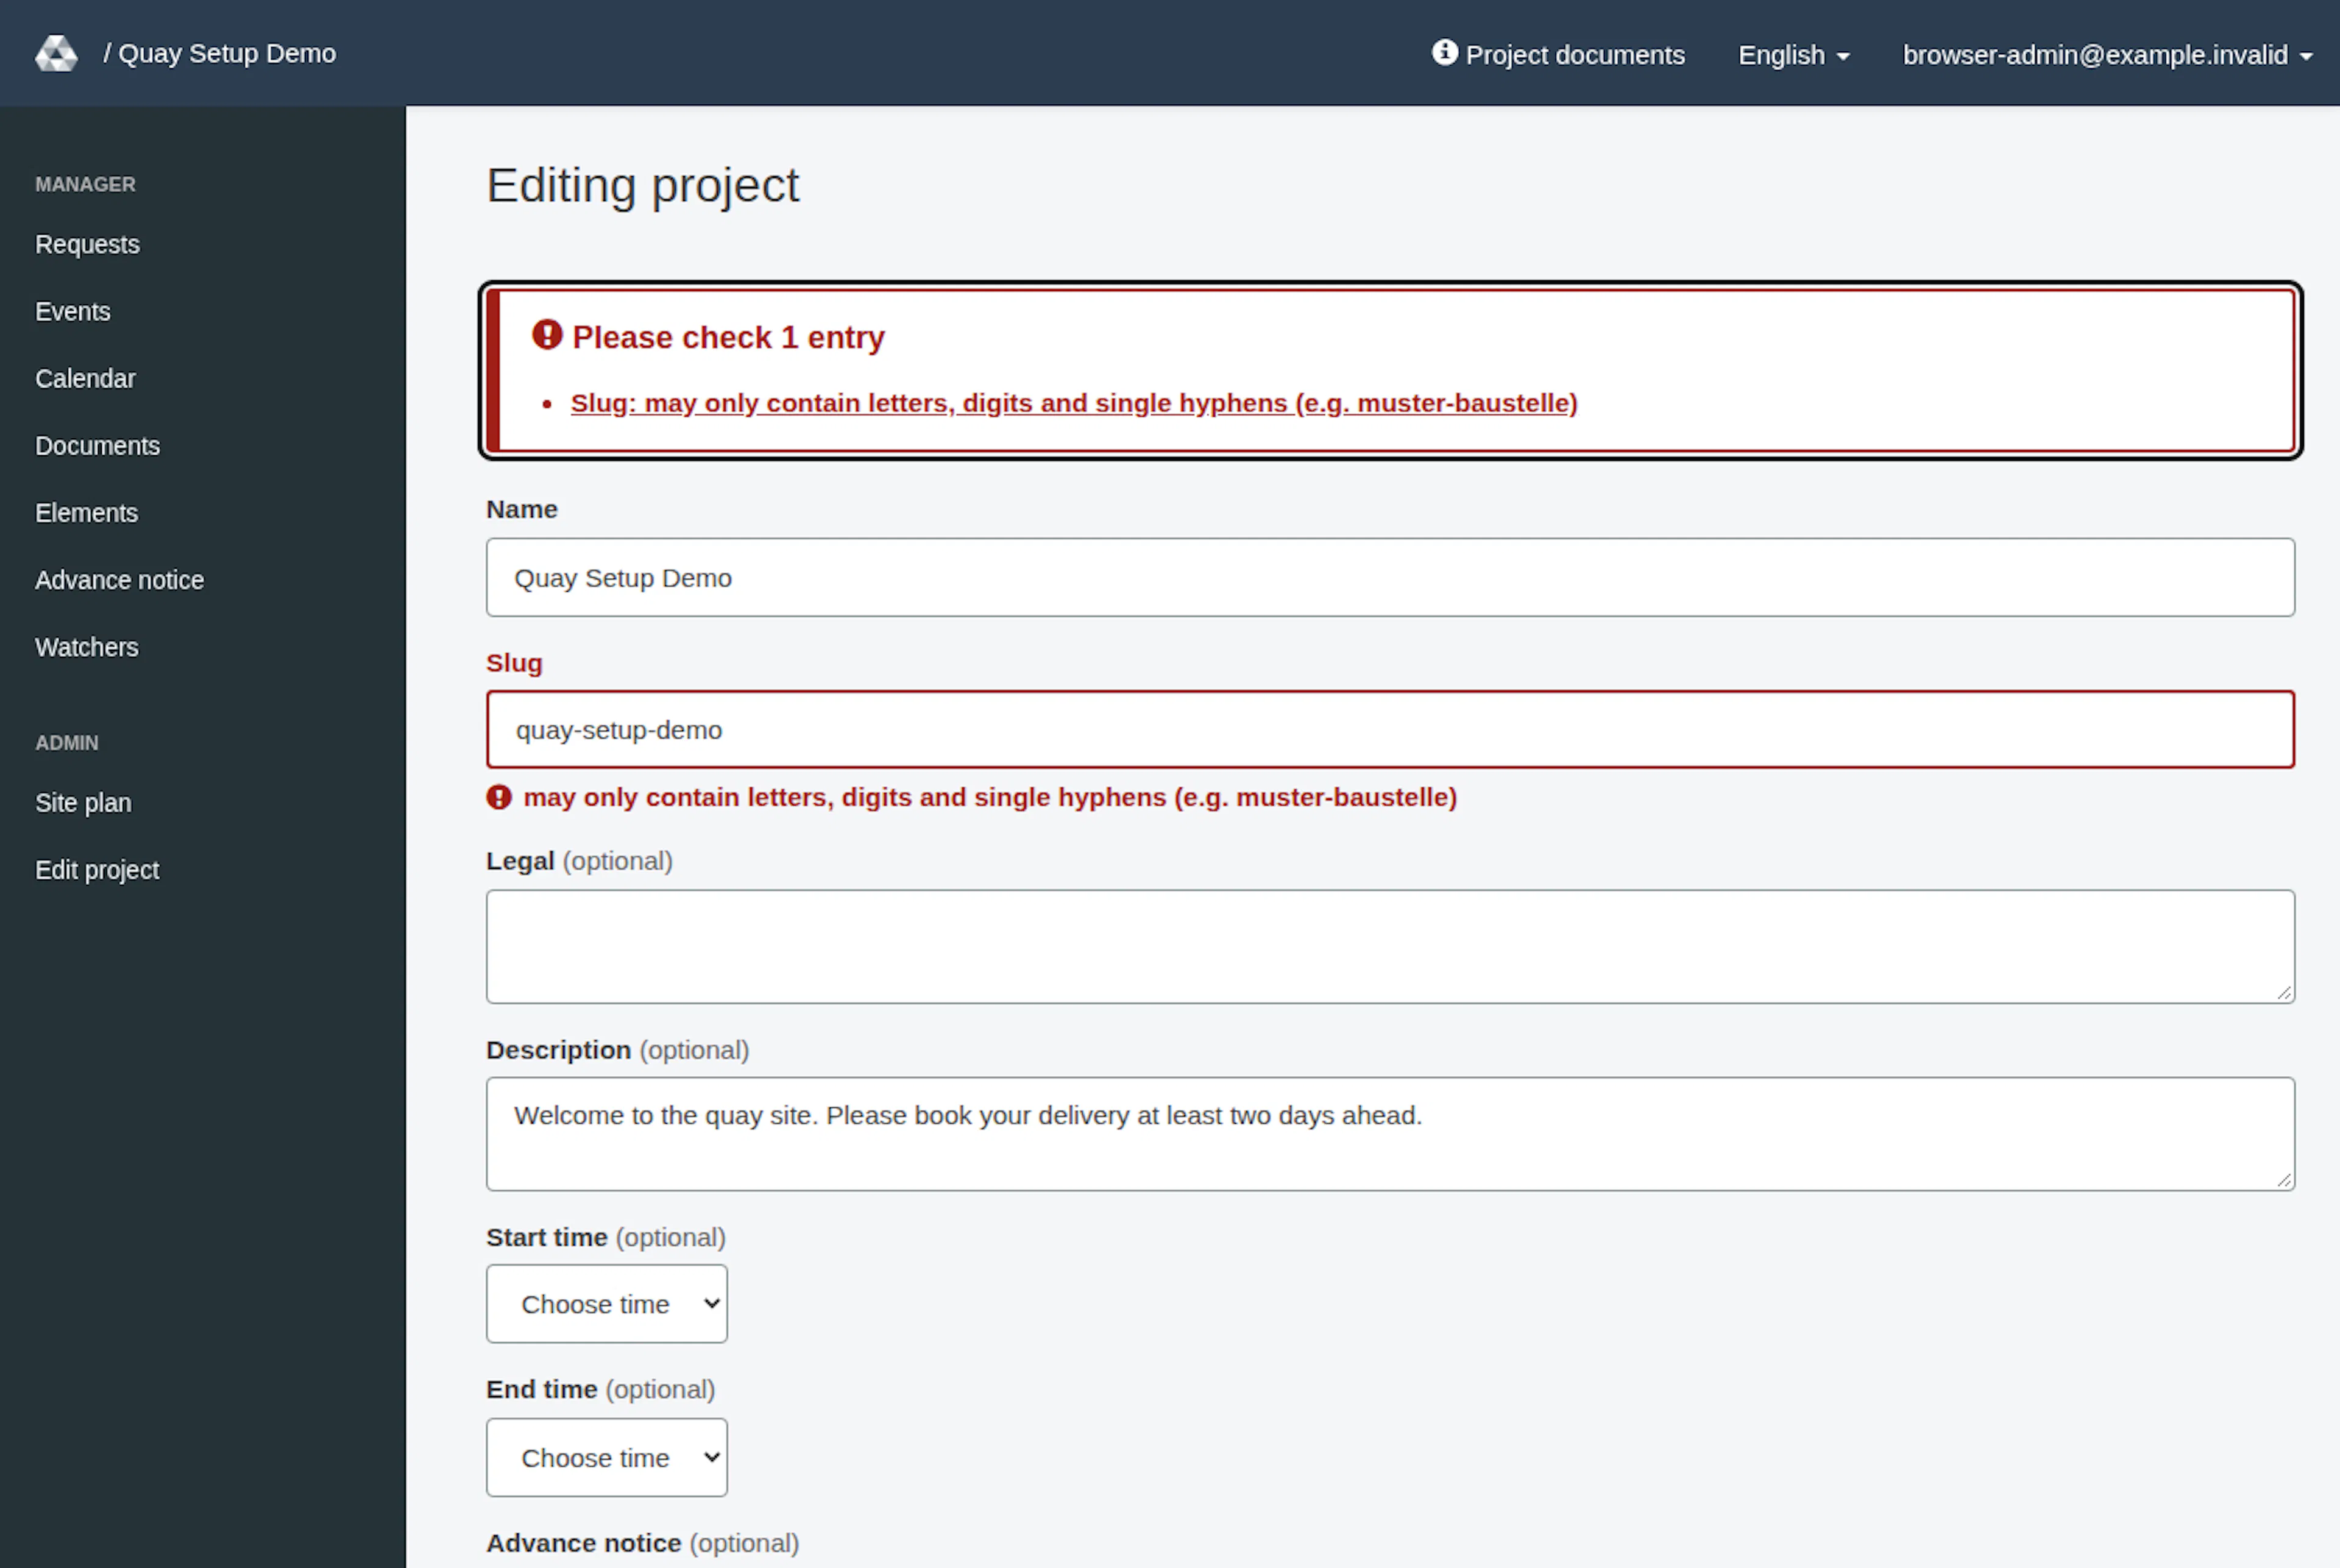
rera.io/<slug>) and may only contain letters, digits and single hyphens, for examplemuster-baustelle. If the address is not valid, the form returns with a red message at the top and the message "may only contain letters, digits and single hyphens (e.g. muster-baustelle)" at the Slug field. Nothing is saved until you correct it. If operating start and end times are supplied, the end must follow the start. - Open the saved project's normal interface (
rera.io/<slug>) and choose Edit project to maintain its supported presentation and request settings. As a global administrator you find it in the project menu under Admin. On a phone, open Menu first.
Only global administrators can create project records. Creating a record does not establish which optional features or user access apply. Check optional feature availability separately from normal project settings, and confirm account roles and current project assignments.
Configure the existing project
| Setting | Administrator task |
|---|---|
| Name and slug | Set the project name and its public address (field Slug, rera.io/<slug>). A new or changed address may only contain ASCII letters (A–Z, a–z), digits and single hyphens, with no spaces and no hyphen at the start, at the end or twice in a row. Existing addresses, including capital letters, stay as they are until you change them |
| Description | Provide the introduction shown on the project start page |
| Legal | Provide the project terms shown in the request journey |
| Start time and end time | Choose the project operating hours from the lists (15-minute steps; Choose time means nothing chosen). Both are optional. If you choose both, the end must be later than the start. In the booking form, new or changed arrivals must fit these hours and be at least 15 minutes before a configured closing time. Departure must be after arrival; a new or changed departure must not be later than a configured closing time. A saved time can remain unchanged when its date stays the same. Without hours, the whole day is offered. Managers accepting with changes or amending a request can use times outside this window |
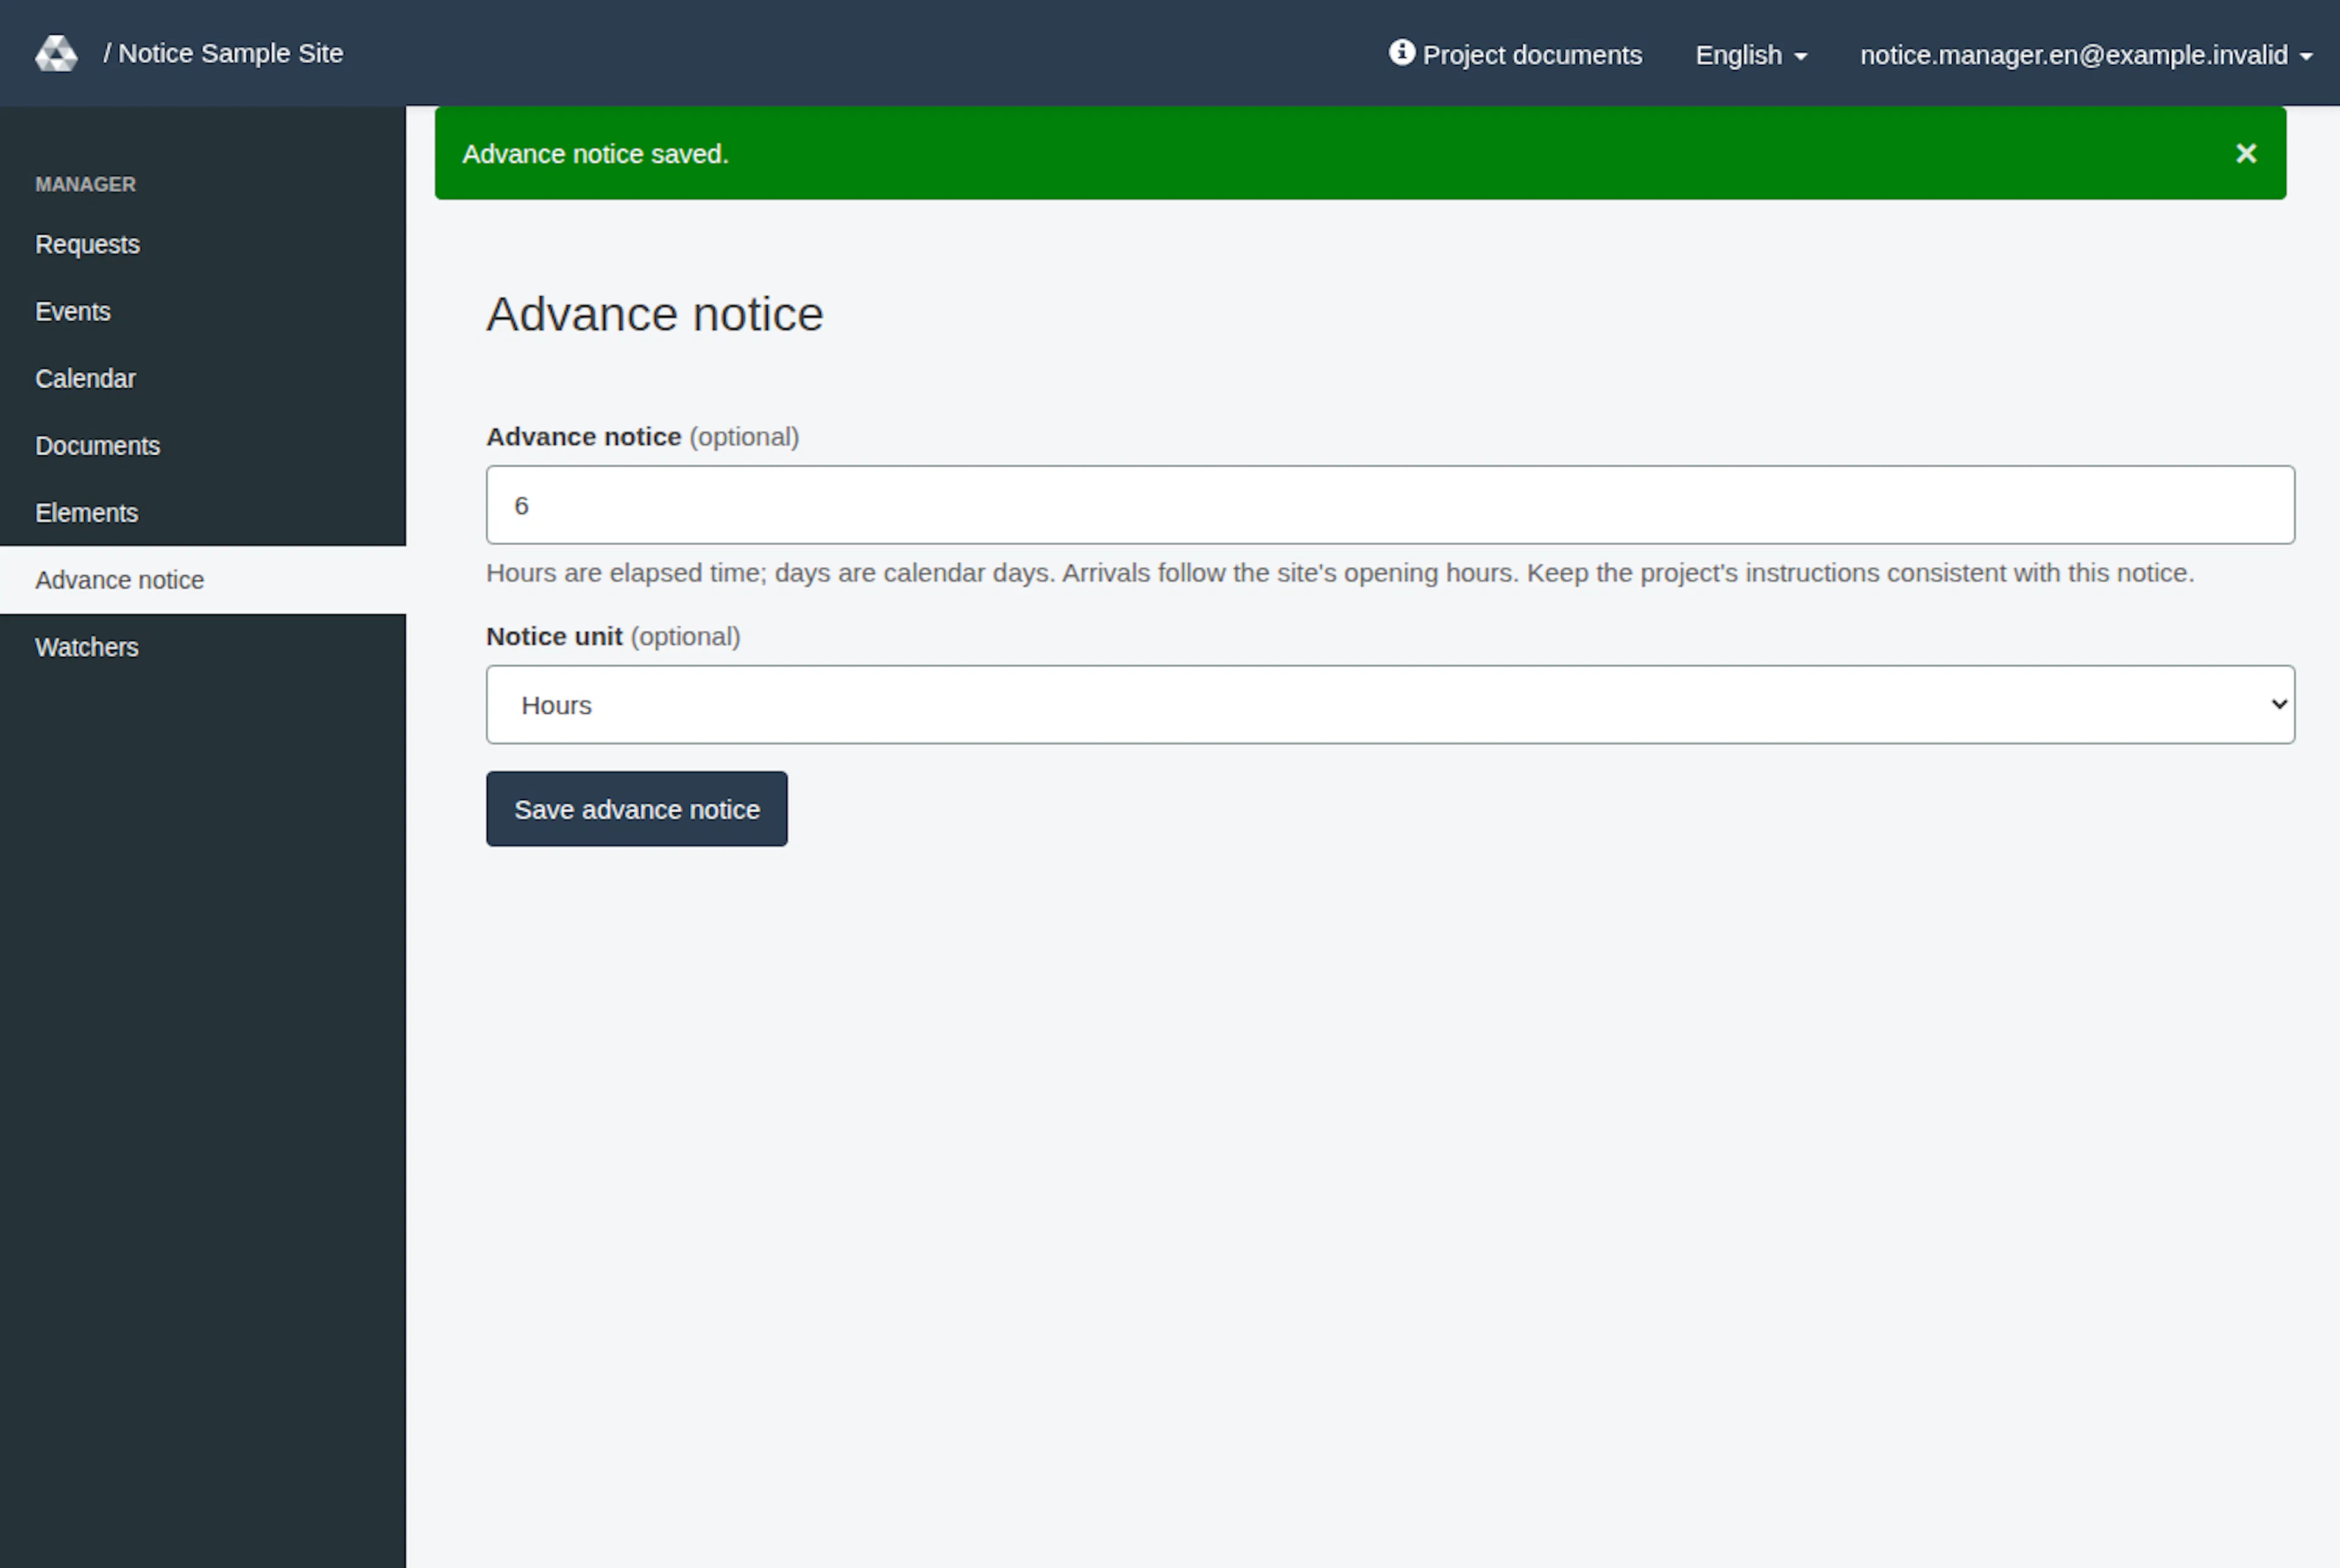
| Advance notice | Set the minimum notice for new bookings as a nonnegative whole number of hours or days (0 is allowed). The current default is 2 calendar days. Hours are elapsed time; days are calendar days. The earliest arrival follows opening hours and 15-minute arrival slots. This minimum notice does not apply to edits or approvals of saved requests. Keep the project rules text consistent; it is not updated automatically |
| Enable dimensions | Choose whether the listed goods and vehicle-detail questions appear |
| Logo url and Background url | Select project branding images |
| Calendar | Choose Use Google Calendar or Use RERA calendar; for Google, supply the embedded-calendar URL and optional Legend image |
Assigned project managers with an active, confirmed, unlocked account and current access can also open Advance notice from the project menu and choose Save advance notice. This dedicated page is available whether or not team-member management is enabled; it does not grant Edit project or team-management access. Managers who already have general project-settings permission can change the same value in Edit project. A successful save on the dedicated page shows Advance notice saved. If validation fails, the page stays open with error messages. Correct the reported value or unit and choose Save advance notice again.
Fields marked (optional) can stay empty. Fields without that mark are required.
Select Update project. After a successful save the page stays open on Editing project and shows the green message Project settings saved. If something is wrong, the Editing project page stays open, nothing is saved, and a red summary at the top says Please check N entries (Please check 1 entry for a single problem). It lists each problem as a link to its field. The field itself is marked in red with the same message. Then open the public project page (rera.io/<slug>) to check the result. New uploads through the dedicated Documents workflow use private storage, but anyone with an active project document link can open the file without signing in. Previously public storage URLs are not retroactively made private by this change, hiding or replacement. See Project information and documents for the manager workflow and sharing limits.
Documents is standard for signed-in people with the Manager role and a current project assignment, using an active, confirmed, unlocked account with a password already set and any required invitation accepted, with no content-management or member-management flag dependency. Use Documents in the existing account menu or shared sidebar. The project editor has no document section, document upload control or link to Documents. The logo, background and calendar-legend image upload controls remain on the project-settings form. The existing team-management setting is unchanged.
Manage project files through Documents in the normal project interface. Project-file records and the project’s document association are no longer editable in the global administration interface.
Check optional feature availability
Optional features are managed separately from the normal project settings. They can vary by project and by the person using the form. If an option is unavailable, contact an authorized RERA administrator or support. After an authorized change, check the relevant public and manager views. Do not infer availability from a field or guide. Change only the setting and audience you are authorized to manage.
Complete related setup
Use Resources and access to configure destinations, tools, relationships and account grants. Team invitations and global administrator invitations are different workflows.
If an action is refused because your signed-in account lacks permission, RERA shows the permission message: "You do not have permission to open this page. Please contact RERA support (service@rera.io) if you need access." Check your account status and administrator authority. If you are using a Manager account, also check the current project assignment and team-management setting; global administrators have separate access. Sign-in requirements and missing or hidden records can produce other responses. If a project form fails, correct its errors rather than assuming a record was saved. If an authorized option is still unavailable, contact your RERA administrator or support.
Set up a client and project
These images show the English RERA interface, captured on 13 November 2026 UTC in a synthetic local project. Example project dates use a synthetic January 2030 clock. The GIF presents selected actual steps. Options depend on the project and your role.